先日のGNS3でDocker使ってJupyter Notebook動かすのに味をしめてなにか他にできないかなーと考えてました。
そこでふと思い出したのが以下のエントリ。

- そういえばフルルートってどんなものか見たことないなぁ
- VyOSでの記事はあるけど、Cisco機器だとどうなるのかな?
ってことでやってみました。一部ハマりどころがあったけどなんとか解決できました。
環境
前回とほぼ変わんないですね。フルルート受ける仮想ルータが違いますが。
- Macbook Air(Mid 2013, Core i7, RAM 8GB)
- macOS High Sierra 10.13.3
- GNS3 2.1.3
- GNS3 VM on VMware Fusion
- gns3/ubuntu Dockerイメージ
- 何らかCiscoデバイス(GNS3上で動作するやつ。今回はCSR1000vとIOS-XRvを使用)
手順
gns3/ubuntu Dockerイメージの追加
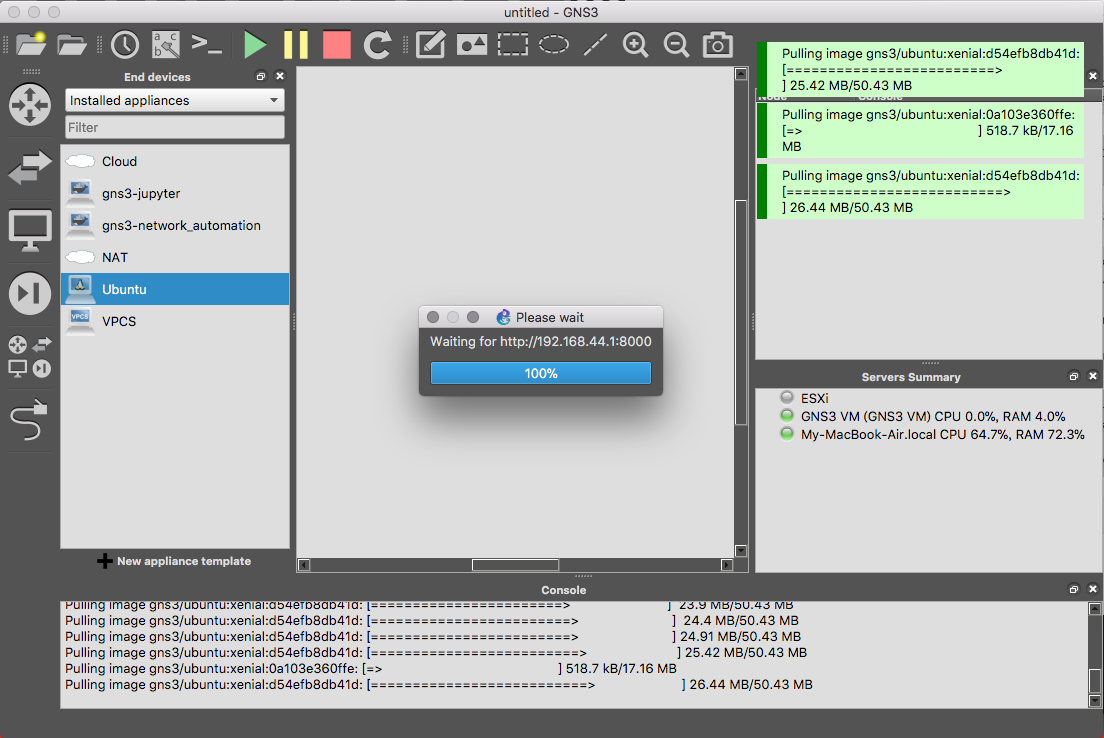
1. “End Device”の【Ubuntu】をトポロジエリアにドロップ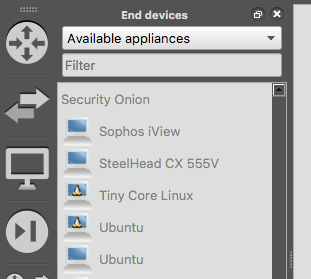
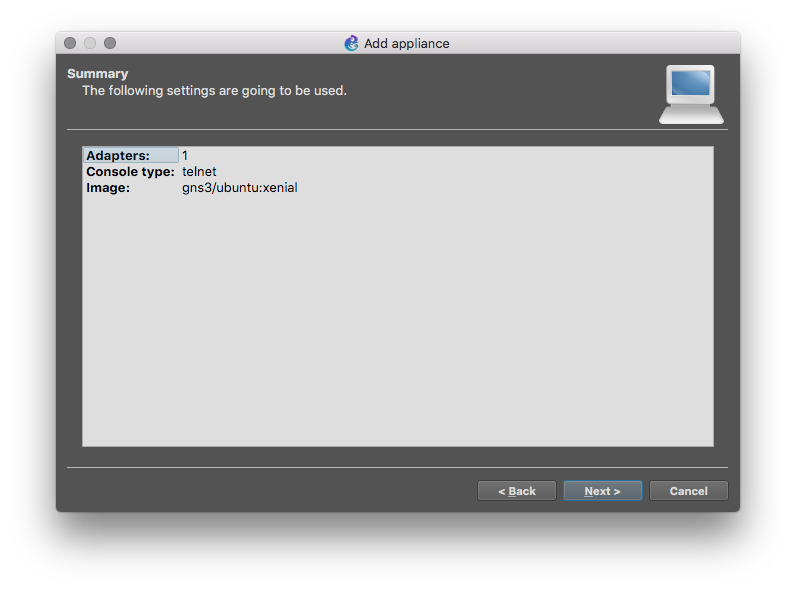
2. 以下のイメージのように表示されていることを確認して Next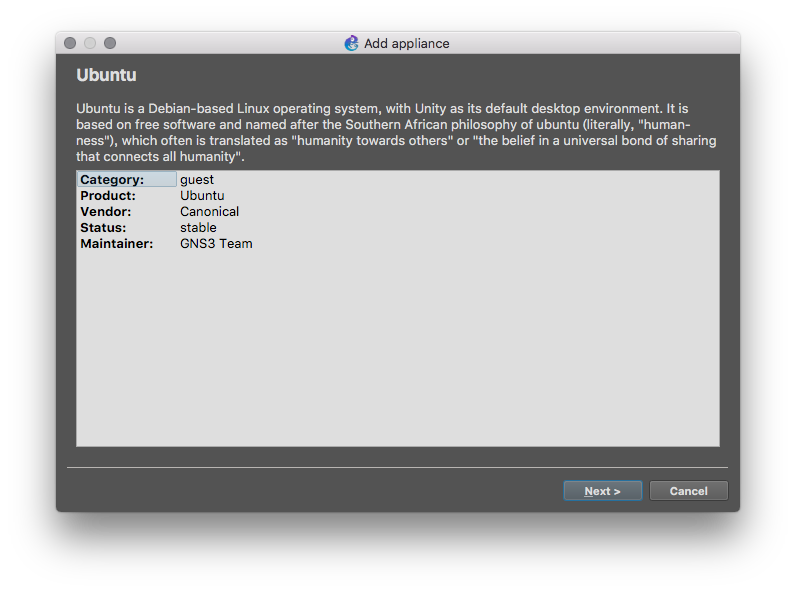
※以下のように表示されている場合はDockerではなくQEMUイメージのほうなので、今回は使いません。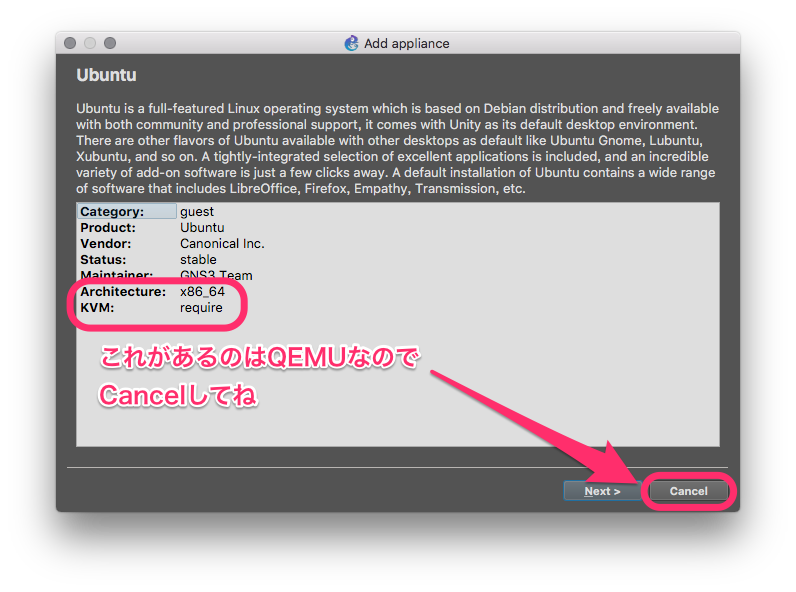
3. “Server Type”を”Run this Docker VM on the GNS3 VM”にしてNext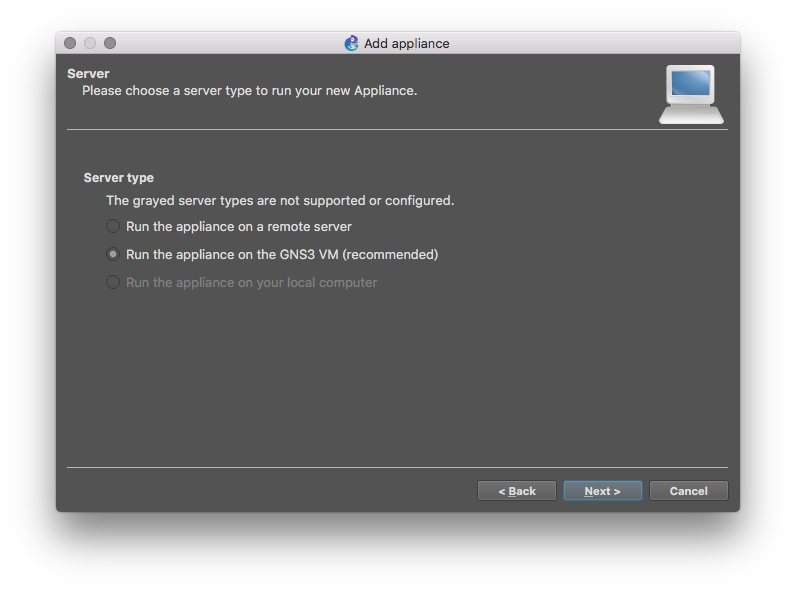
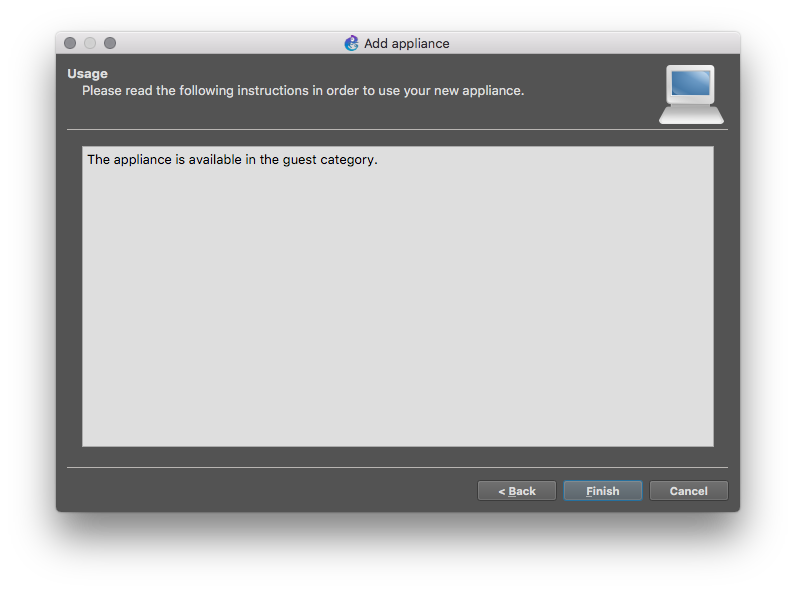
6. 「Available Appliance」を「Installed Appliance」にすると、以下のように”Ubuntu”が追加されています。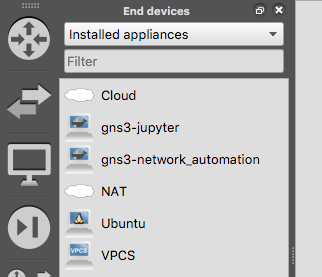
8. 登録されたノードを右クリックして「Configure」を選択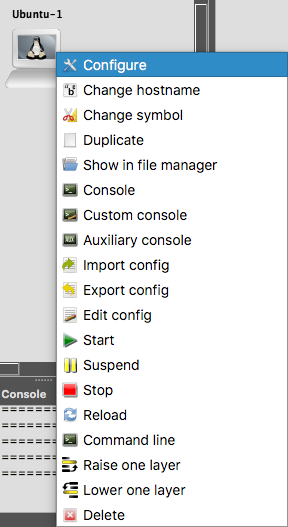
9. “Adapters”を「2」に変更後、”Network Configuration”の「Edit」ボタンをクリック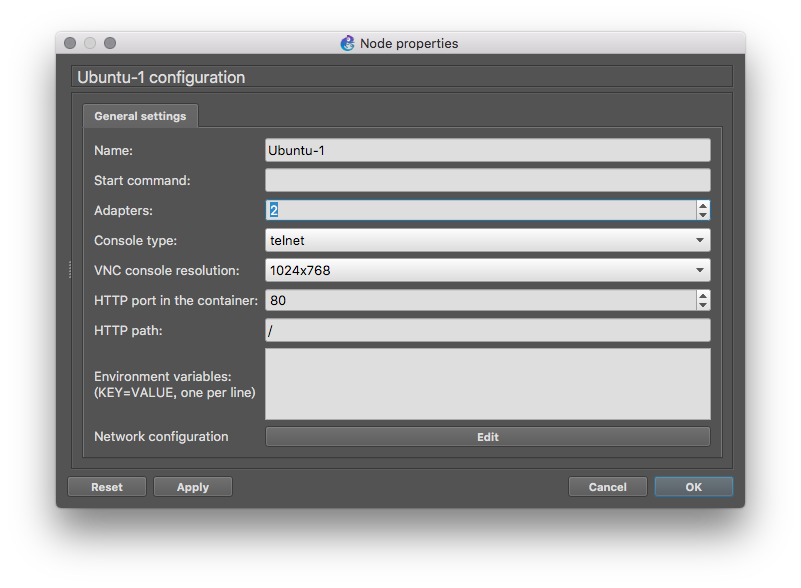
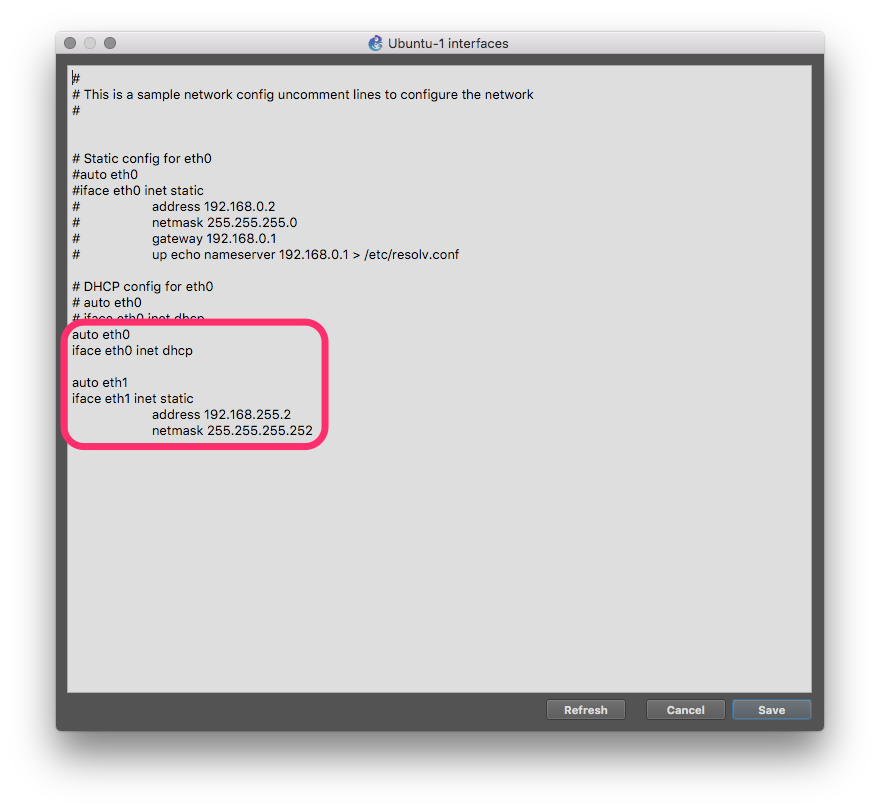
10. 以下のようにネットワーク設定を追加(eth1のアドレスは任意のものでかまいませんが、今回は以下のものを使用します)
auto eth0

iface eth0 inet dhcp
auto eth1
iface eth1 inet static
address 192.168.255.2
netmask 255.255.255.252
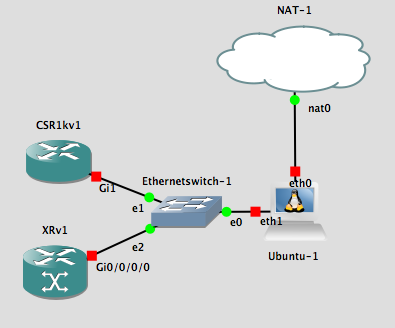
11. その他のノードを以下のように接続します。ポイントは以下の2点
- Ubuntuノードのeth0とNATクラウドを接続
- Ubuntuノードのeth1とフルルートを注入したいルータを接続
Ubuntuノードの環境作成
UbuntuにGo言語実行環境とGoBGPのインストールを行います。前回同様、NATクラウドを経由してインターネットから必要なパッケージなどを取得してきます。
1. Ubuntuノードを右クリックし”Start”
2. Ubuntuノードを右クリックし”Console”
3. 以下のようにコンソールが開くことを確認する
Ubuntu-1 console is now available... Press RETURN to get started.
udhcpc (v1.24.2) started
Sending discover...
Sending discover...
Sending discover...
Sending select for 192.168.122.201...
Lease of 192.168.122.201 obtained, lease time 3600
root@Ubuntu-1:~#
4. 以下のコマンドでパッケージ群のアップデートと使用するパッケージをインストール
root@Ubuntu-1:~# apt update
root@Ubuntu-1:~# apt -y upgrade
root@Ubuntu-1:~# apt -y install ca-certificates git wget bzip2
5. Go言語の実行環境とGoBGPdおよびGoBGPをインストール
※記事執筆時点で、Go言語をaptでインストールすると1.6がインストールされるが、GoBGPdのインストール時に実行されるコンパイルで”sort.SliceStable()”をサポートしていないと怒られてしまうので、素直に公式サイトからダウンロード、インストールを行うようにしています。
root@Ubuntu-1:~# wget https://dl.google.com/go/go1.9.4.linux-amd64.tar.gz
root@Ubuntu-1:~# tar xzf go1.9.4.linux-amd64.tar.gz -C /usr/local
root@Ubuntu-1:~# echo 'export GOROOT=/usr/local/go' >> ~/.bashrc
root@Ubuntu-1:~# echo 'export GOPATH=$HOME/go' >> ~/.bashrc
root@Ubuntu-1:~# echo 'export PATH=$GOROOT/bin:$GOPATH/bin:$PATH' >> ~/.bashrc
root@Ubuntu-1:~# source ~/.bashrc
root@Ubuntu-1:~# mkdir $HOME/go
root@Ubuntu-1:~# go get github.com/osrg/gobgp/gobgpd
root@Ubuntu-1:~# go get github.com/osrg/gobgp/gobgp
6. 以下のコマンドでGoBGPdの設定ファイルを作成しGoBGPdを起動します。
root@Ubuntu-1:~# cat <<EOF > gobgpd.conf
[global.config]
  as = 65534
  router-id = "254.254.254.254"

[[neighbors]]
[neighbors.config]
  neighbor-address = "192.168.255.1"
  peer-as = 65000
EOF

root@Ubuntu-1:~# gobgpd -f gobgpd.conf &
仮想ルータの設定
フルルートを注入する仮想ルータを起動し、BGPピアリングできるように以下のような設定を行います。なお、フルルート受けるルータはメモリが十分にないと受け取れないので、最低でも4GBはメモリを割り当ててください。
また、上述のkooshinさんのブログでもあるように「ネクストホップに到達できない」を回避するためにLoopback0に同様のアドレス割当を行いました。
■IOS(CSR1000vで確認)
conf t
interface Loopback0
 ip address 202.249.2.1 255.255.255.0
!
interface GigabitEthernet1
 ip address 192.168.255.1 255.255.255.252
 no shutdown
!
router bgp 65000
 bgp router-id 1.1.1.1
 bgp log-neighbor-changes
 neighbor 192.168.255.2 remote-as 65534
!
end
■IOS-XRv
conf
logging console notifications
line console
 exec-timeout 0 0
!
interface Loopback0
 ipv4 address 202.249.2.1 255.255.255.0
!
interface GigabitEthernet0/0/0/0
 ipv4 address 192.168.255.1 255.255.255.252
 no shutdown
!
!
route-policy PASS
  pass
end-policy
!
router bgp 65000
 bgp router-id 1.1.1.1
 address-family ipv4 unicast
 !
 neighbor 192.168.255.2
  remote-as 65534
  address-family ipv4 unicast
   route-policy PASS in
   soft-reconfiguration inbound
  !
 !
!
end
注入できない→できた!
MRTデータからGoBGPdにフルルートを注入し、仮想ルータに広報させます。もととなるデータはWIDEプロジェクトのRouteViewsアーカイブから取ってきます。
今回は記事作成年月(2018年2月)の最初のRIBデータ(rib.20180201.0000.bz2)を使うことにします。
Ubuntuのコンソールで以下のコマンドを実行し、RIBデータの取得とGoBGPへの注入を行いました。
root@Ubuntu-1:~# wget http://archive.routeviews.org/route-views.wide/bgpdata/2018.02/RIBS/rib.20180201.0000.bz2
root@Ubuntu-1:~# bzip2 -d rib.20180201.0000.bz2
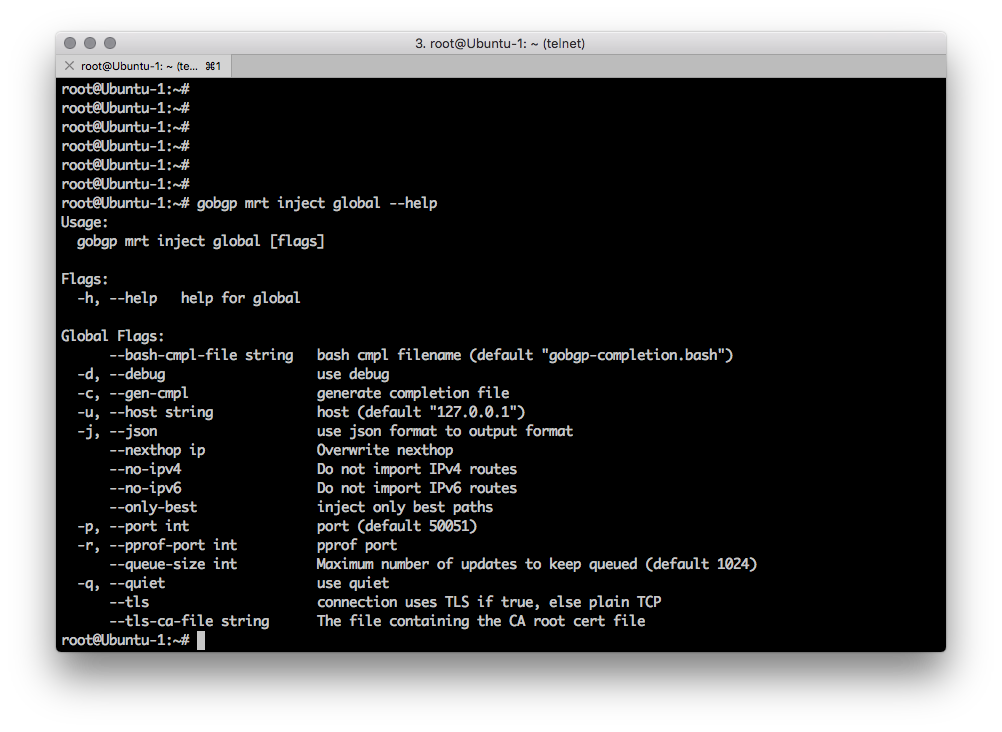
root@Ubuntu-1:~# gobgp mrt inject global rib.20180201.0000
しかしこのままではうまく行きません。ピアリングもできてUPDATEメッセージも受けているのですが有効なプレフィックスとなっていないようです。
試しにdebug ip bgp updateをやってみると、以下のようにNEXT_HOPが不正なために仮想ルータ側が拒否していることがわかります。
*Feb 13 12:52:58.215: BGP(0): 192.168.255.2 rcv UPDATE about 66.15.223.0/24 -- DENIED due to: non-connected NEXTHOP;
*Feb 13 12:52:58.215: BGP: 192.168.255.2 Advertised Nexthop 202.249.2.169: Non-local or Nexthop and peer Not on same interface
どうやらVyOSと同じ設定ではCiscoルータはだめみたいです。もう少し調べてみました。
まず、実際のRouteViewsのルータがどのようにピアリングしているのかをログインして見てみました。
$ telnet route-views.wide.routeviews.org
Trying 203.178.141.138...
Connected to route-views.wide.routeviews.org.
Escape character is '^]'.

Hello, this is Quagga (version 0.99.23.1).
Copyright 1996-2005 Kunihiro Ishiguro, et al.

route-views.wide.routeviews.org> show ip bgp summary
BGP router identifier 202.249.2.166, local AS number 6447
RIB entries 1250622, using 134 MiB of memory
Peers 8, using 36 KiB of memory

Neighbor        V    AS MsgRcvd MsgSent   TblVer  InQ OutQ Up/Down  State/PfxRcd
202.112.60.243  4  4538       0       0        0    0    0 never    Active
202.249.2.20    4  4777 1630240 1614300        0    0    0 43w0d01h        2
202.249.2.83    4  2500 1655831 1614204        0    0    0 51w2d22h      688
202.249.2.86    4  7500 117623596 1614307        0    0    0 41w0d12h   676710
202.249.2.169   4  2497 124907919 1995328        0    0    0 24w0d01h   678562

Total number of neighbors 5
MRTデータはイメージ的には以下のようにピアリングしているルータのBGPテーブルをそのまま持ってきています。受け取る仮想ルータからはGoBGPd(192.168.255.2)より向こうにネクストホップルータがあるように見えているので、EBGPの前提である直接接続を満たしておらず、広報されたプレフィックスを受け取れていないと考えられます。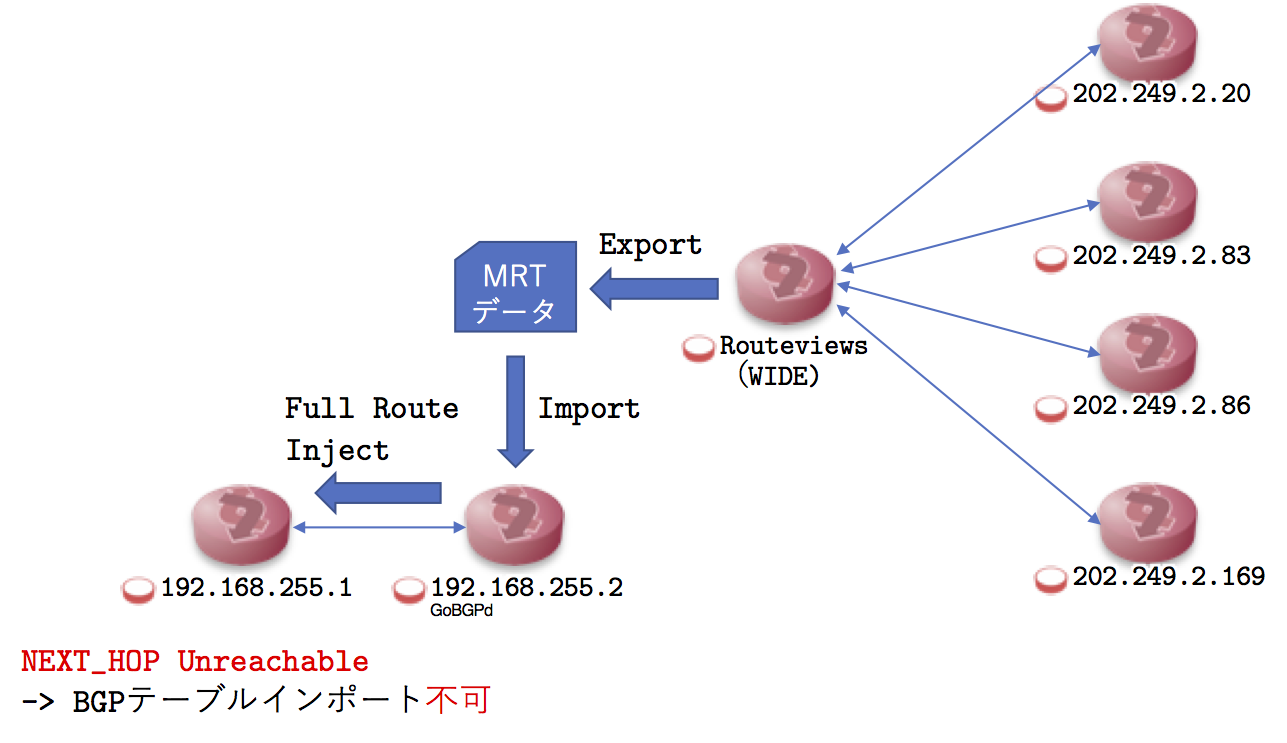
ですが、VyOSと同じようにLoopback0で広報されたプレフィックスのネクストホップと同じセグメントをLoopbackで直接接続インターフェースとして作れば、ネクストホップへの到達性確保というレベルではできているはずです。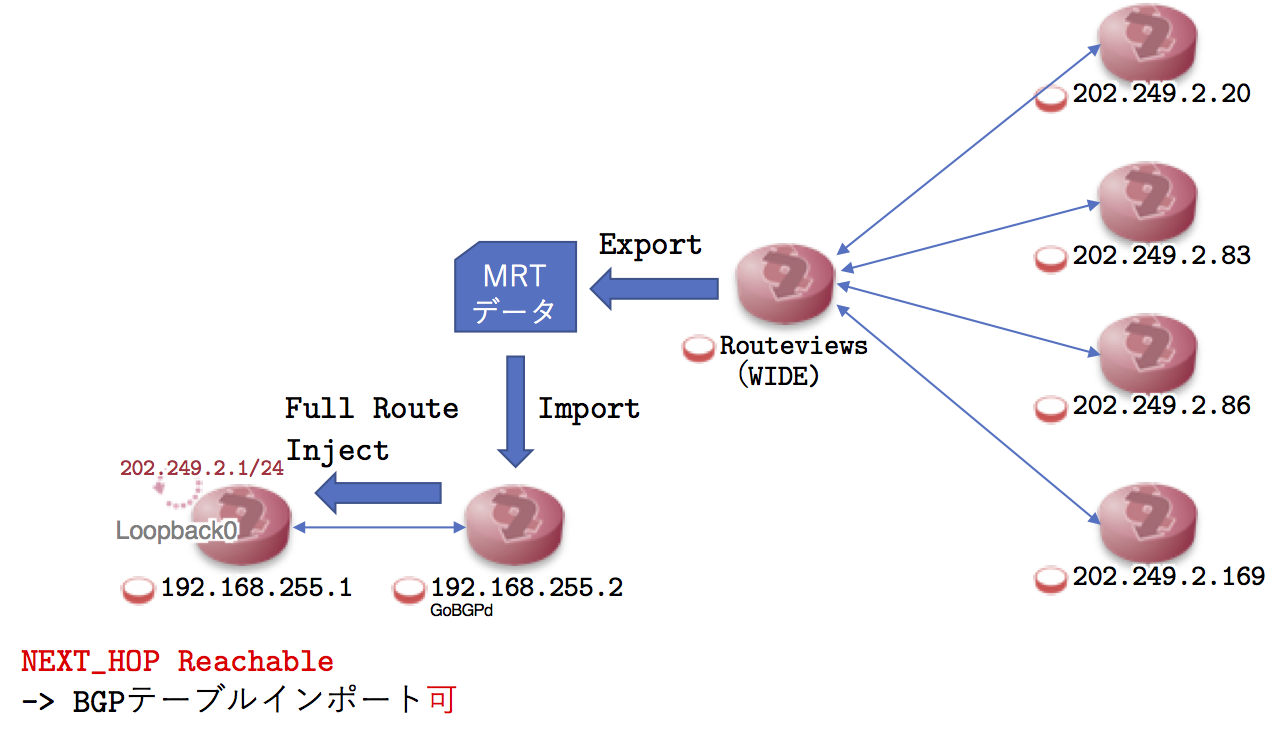
ということは、debugの出力にも出ているとおりネクストホップがプレフィックスを受信したインターフェースと違うところにあるのでNGなのだろうと考え、以下の2つの設定を追加することにしました。
※直接接続ではない、数ホップ先のルータをネクストホップとできるようにするための設定です。
- 直接接続チェックの無効化
- EBGPマルチホップの有効化
実際の設定はそれぞれ以下のようになります。
■IOS
conf t
no interface Loopback0
router bgp 65000
 neighbor 192.168.255.2 ebgp-multihop 255
 neighbor 192.168.255.2 disable-connected-check
!
end
■IOS-XR
conf
no interface Loopback0
router bgp 65000
 neighbor 192.168.255.2
  ebgp-multihop 255
  ignore-connected-check
!
end
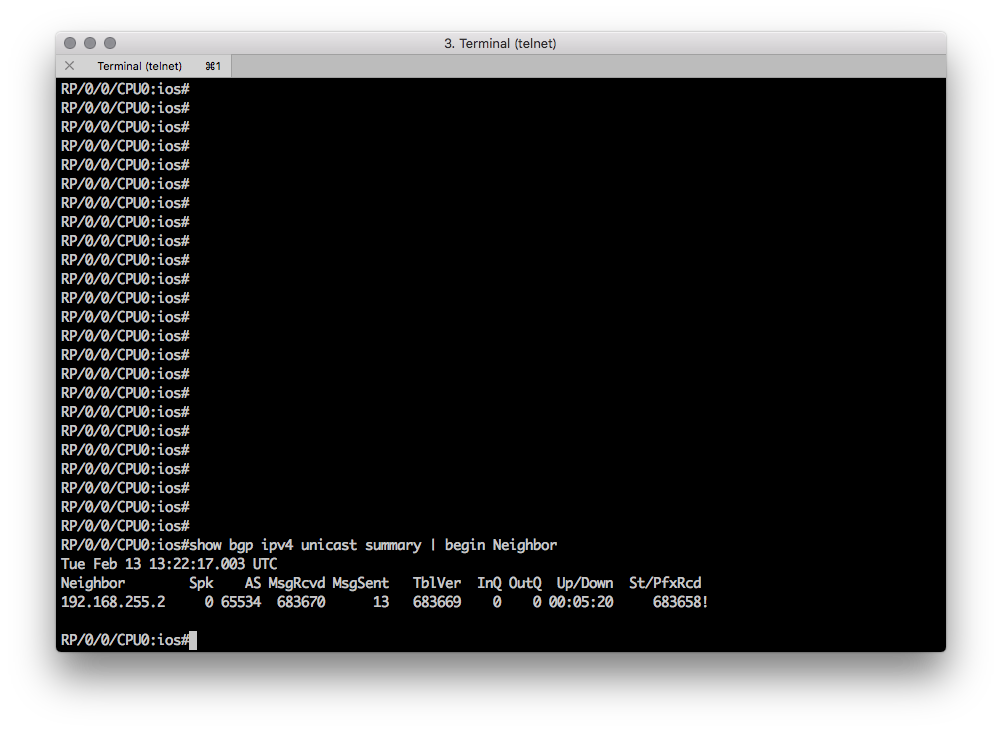
これで無事フルルートを受けることができるようになりました!(68万経路…!)
Router#show ip bgp summary
BGP router identifier 1.1.1.1, local AS number 65000
BGP table version is 683659, main routing table version 683659
683658 network entries using 169547184 bytes of memory
683658 path entries using 82038960 bytes of memory
122293/122293 BGP path/bestpath attribute entries using 31307008 bytes of memory
109362 BGP AS-PATH entries using 6221320 bytes of memory
462 BGP community entries using 33512 bytes of memory
0 BGP route-map cache entries using 0 bytes of memory
0 BGP filter-list cache entries using 0 bytes of memory
BGP using 289147984 total bytes of memory
BGP activity 683658/0 prefixes, 683658/0 paths, scan interval 60 secs

Neighbor        V           AS MsgRcvd MsgSent   TblVer  InQ OutQ Up/Down  State/PfxRcd
192.168.255.2   4        65534  683677      22   683659    0    0 00:08:52   683658
RP/0/0/CPU0:ios#show bgp ipv4 unicast summary
Mon Feb 12 13:34:02.919 UTC
BGP router identifier 1.1.1.1, local AS number 65000
BGP generic scan interval 60 secs
Non-stop routing is enabled
BGP table state: Active
Table ID: 0xe0000000   RD version: 683662
BGP main routing table version 683662
BGP NSR Initial initsync version 3 (Reached)
BGP NSR/ISSU Sync-Group versions 0/0
BGP scan interval 60 secs

BGP is operating in STANDALONE mode.


Process       RcvTblVer   bRIB/RIB   LabelVer  ImportVer  SendTblVer  StandbyVer
Speaker          683662     683662     683662     683662      683662           0

Some configured eBGP neighbors (under default or non-default vrfs)
do not have both inbound and outbound policies configured for IPv4 Unicast
address family. These neighbors will default to sending and/or
receiving no routes and are marked with '!' in the output below.
Use the 'show bgp neighbor <nbr_address>' command for details.

Neighbor        Spk    AS MsgRcvd MsgSent   TblVer  InQ OutQ  Up/Down  St/PfxRcd
192.168.255.2     0 65534  683672      15   683662    0    0 00:06:14     683658!
まとめ
先人の知恵をお借りすることで、自分の手元でもフルルート環境を用意することができました。しかし2.5GBとかメモリを食うのを見ると、上位機種がメモリをたくさん載せてるとかいう理由もわかる気がしますね…
2018/02/14追記:
ネクストホップについての補足を別記事で書きました。
コメント